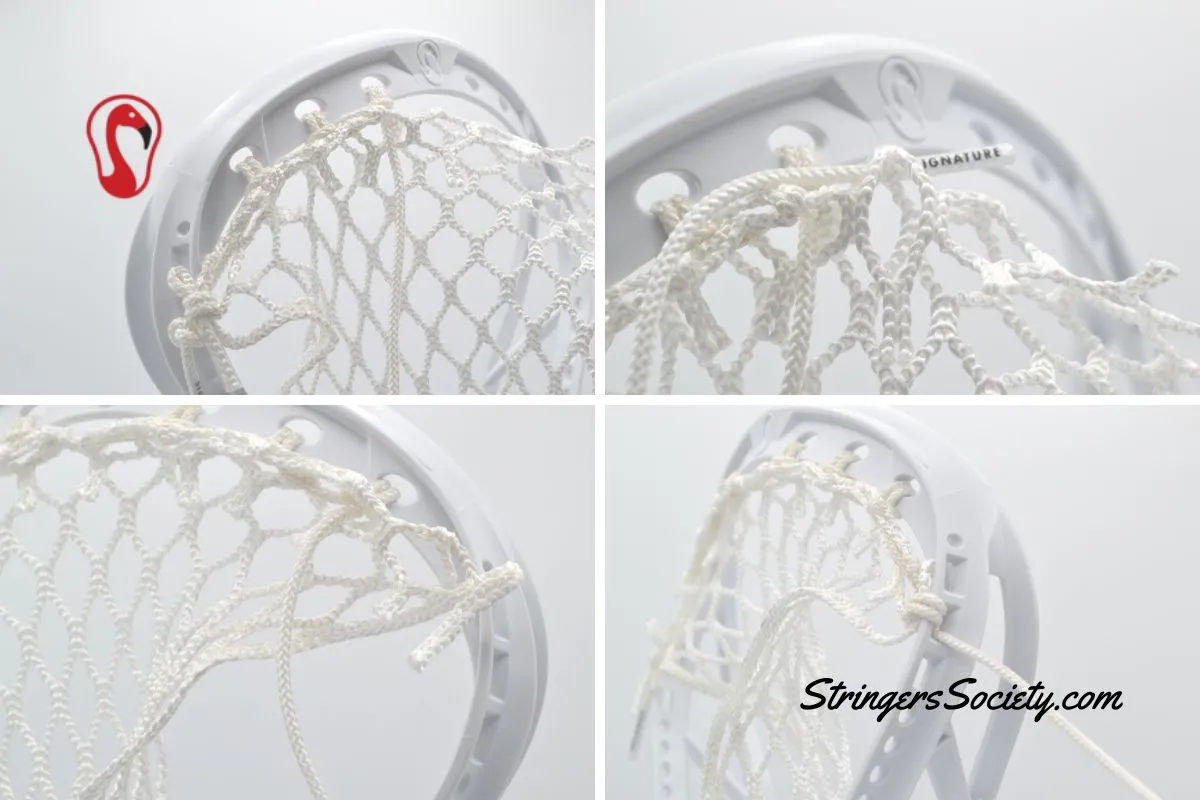
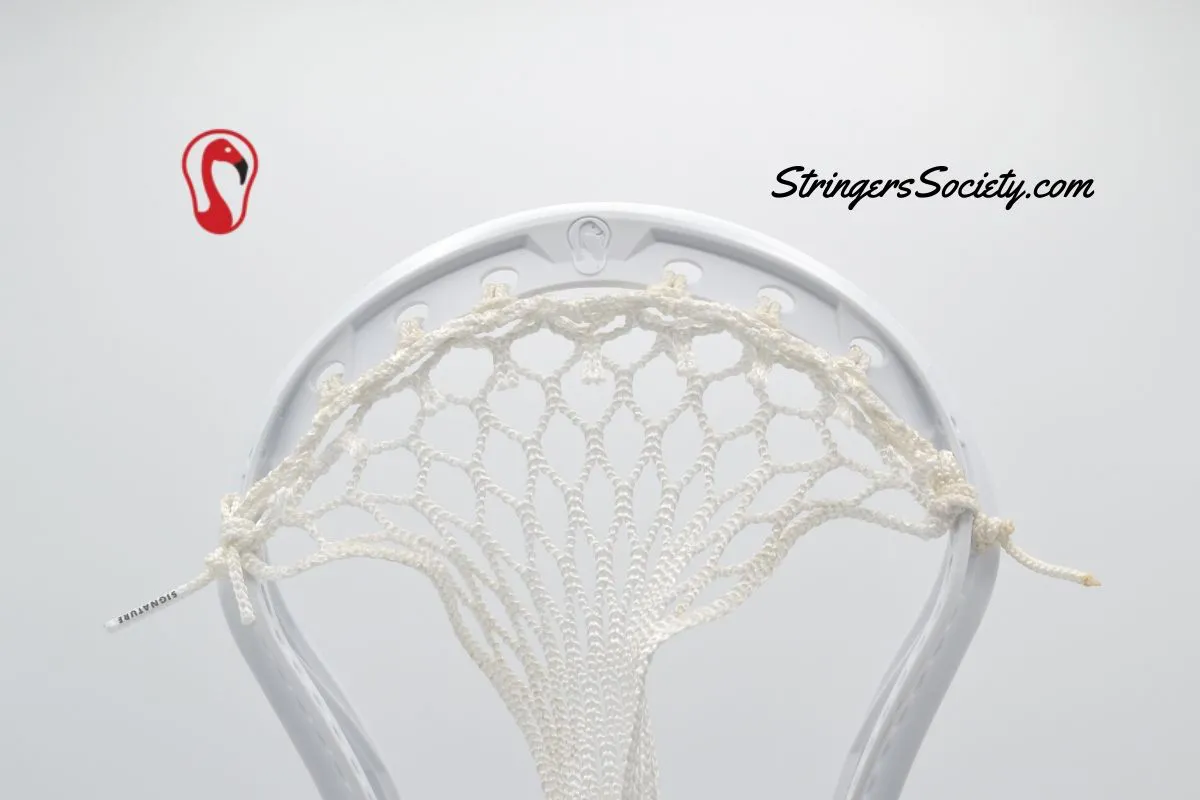
Embark on a journey into the innovative realm of lacrosse stringing with the 9 Diamond Hidden Top String. This design deviates from the conventional by eschewing direct attachment of the mesh to the scoop. Instead, it introduces a distinctive approach, suspending the top string for a revolutionary blend of style and functionality.
9D Hidden Top String vs 9D Top String
The difference between a standard 9d top string and a hidden 9d top string is how the lacrosse mesh is attached to your lacrosse head scoop.
- The 9D Standard Top String anchors down the lacrosse mesh to the lacrosse head scoop; keeping the mesh secured against the plastic.
- The 9D Hidden Top string utilizes a float between the lacrosse mesh and lacrosse head scoop, but is held in place by the lacrosse top “string”.
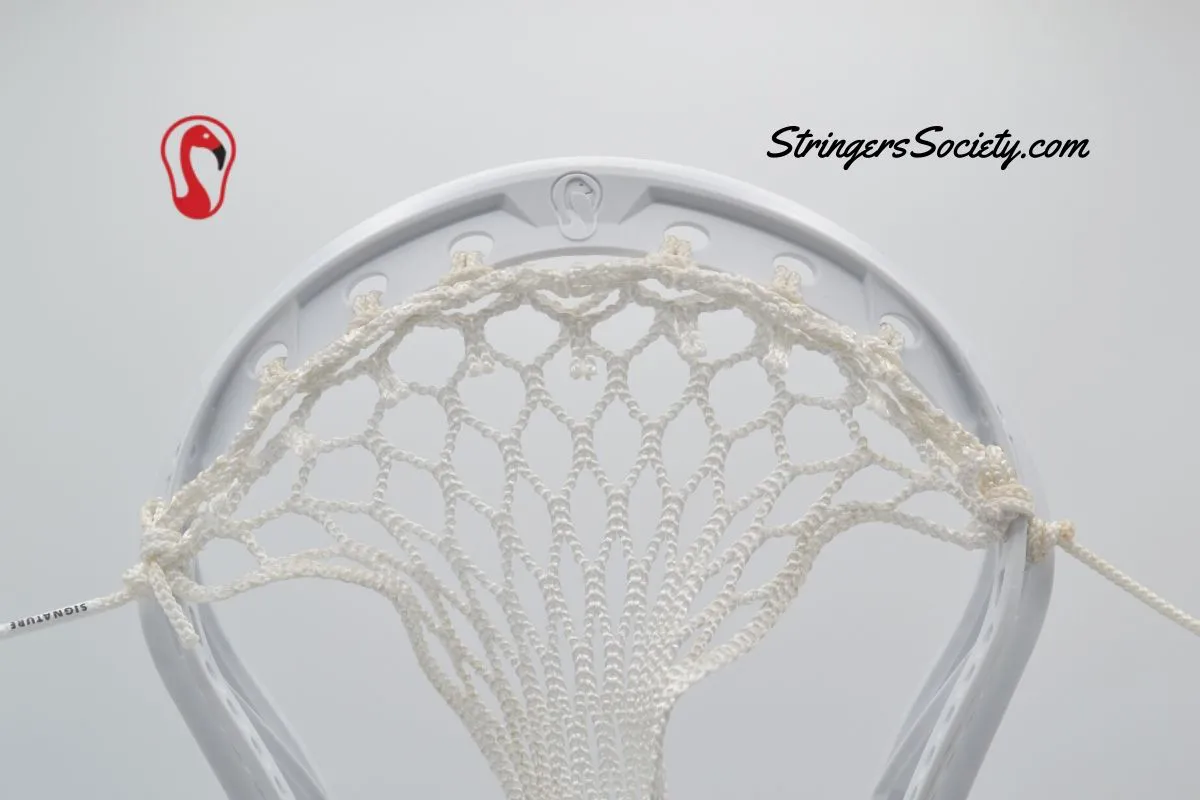
The 9 Diamond Hidden Lacrosse Top String is a pretty simple top string to learn for any lacrosse player learning how to string a lacrosse head. We have outlined 5 easy steps to take when stringing your lacrosse head top string below.
Total Time: 1 hour
-
Prepare Your Lacrosse Stringing Materials

Stretch and fold your lacrosse mesh
-
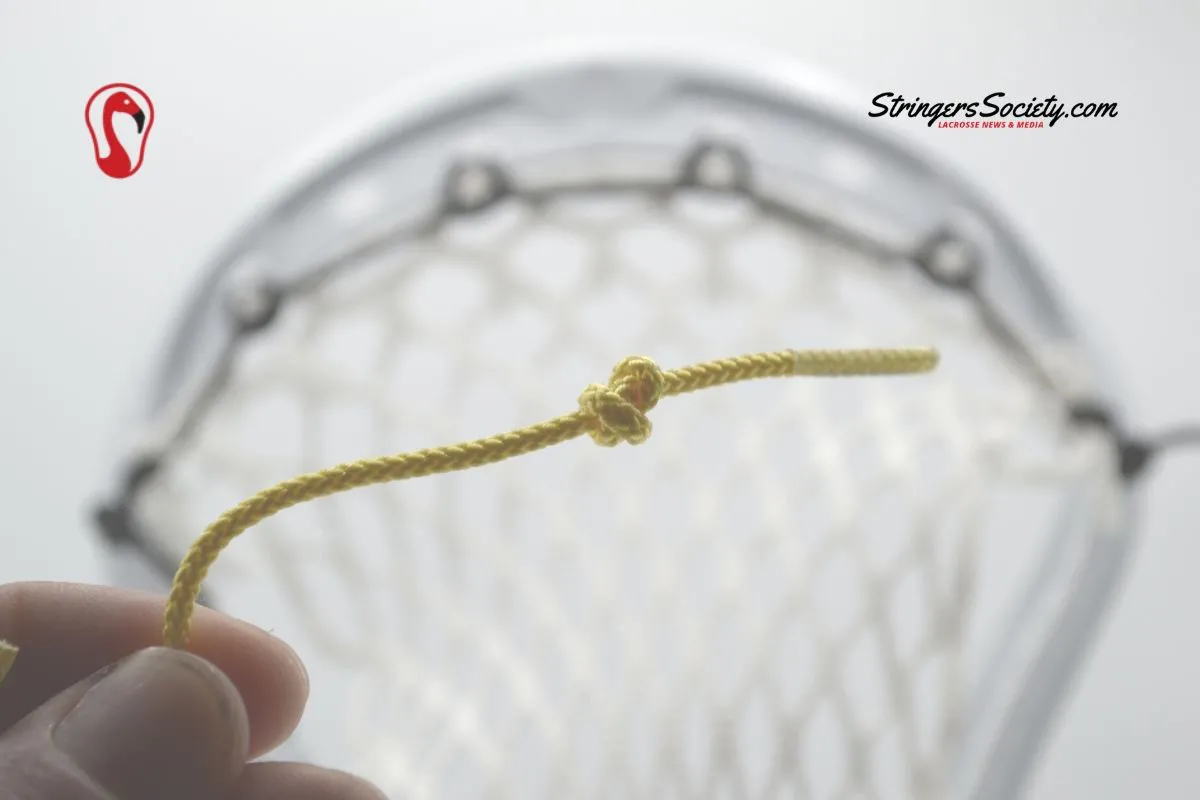
Double Overhand Knot

Tie a double overhand knot or watch our video on how to string a double overhand knot
-
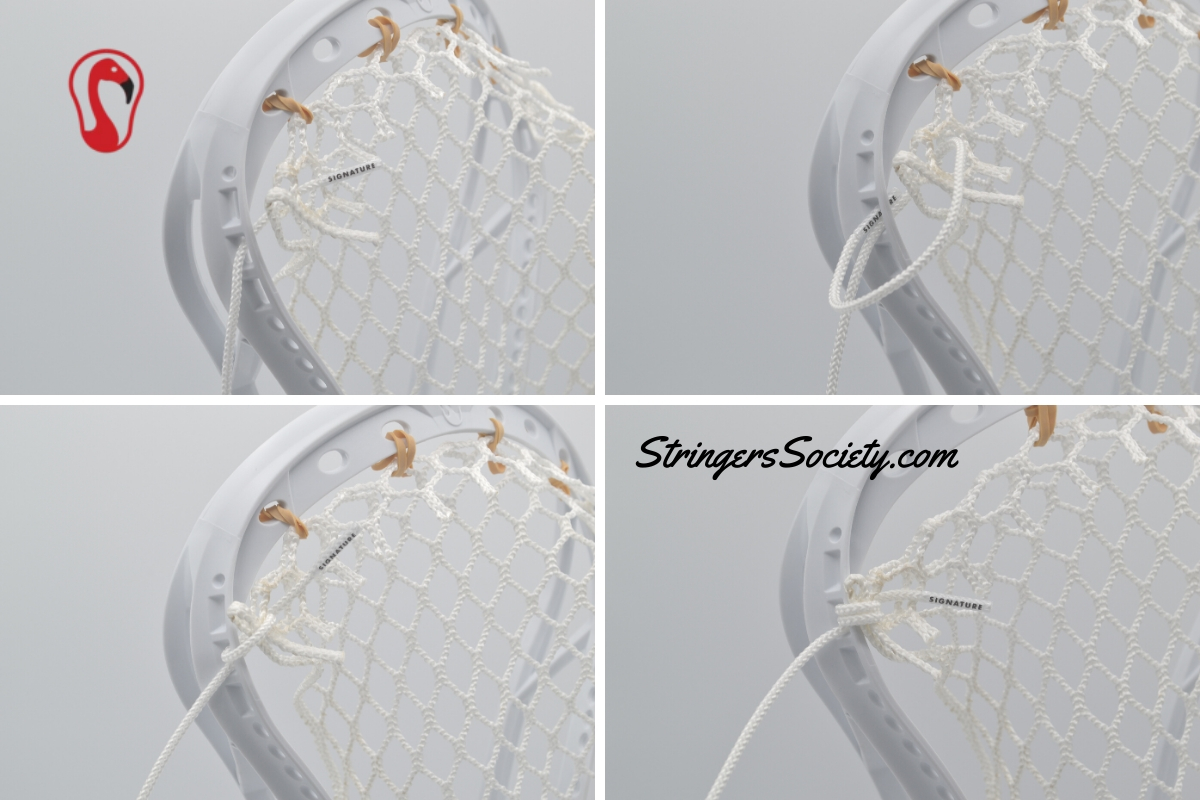
Secure your Lacrosse Mesh to Your Lacrosse Head Sidewall

The photo below shows how we completed step 1 by locking the mesh down to the sidewall. Normally, I would use one sidewall hole and double loop it, but since this head was not designed for that; I had to improvise. This is the first step to stringing a lacrosse stick.
-
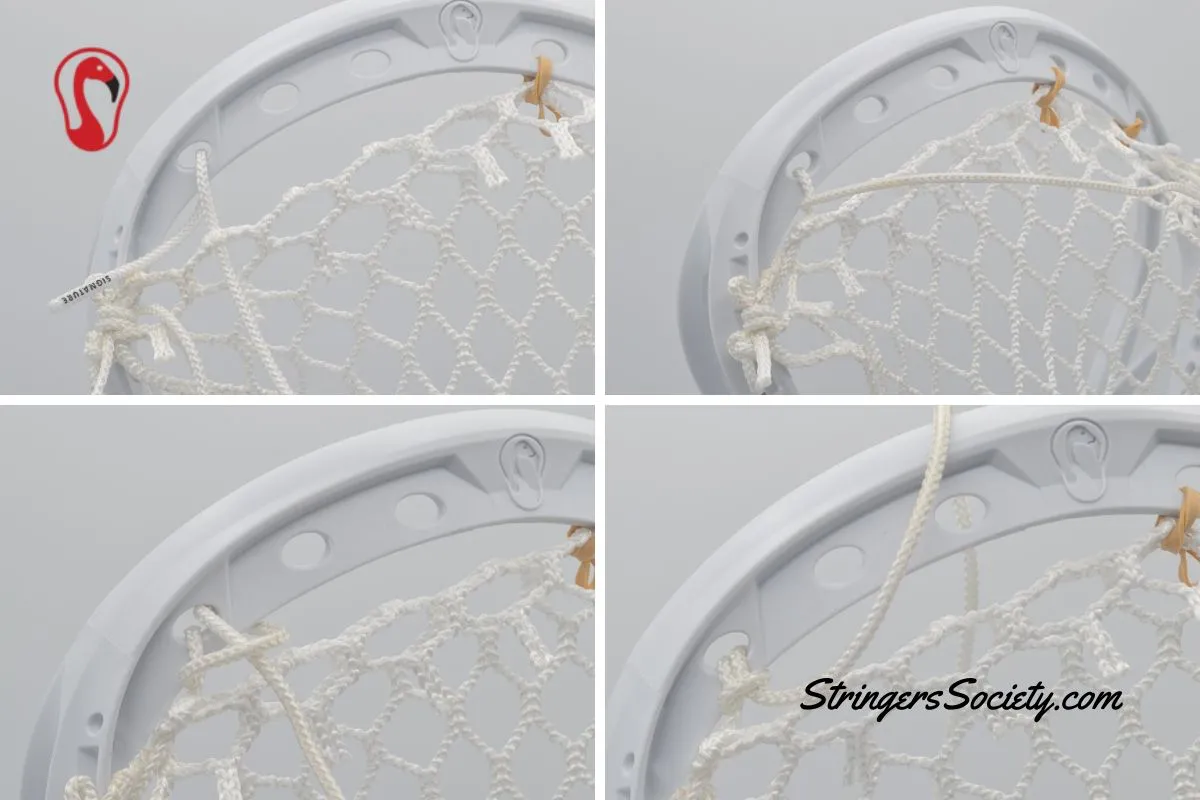
Attach the 2nd Lacrosse Mesh Diamond to the 1st Top String hole

Imagine how you would do a normal 9 diamond top string, but without actually locking the mesh to the scoop. First, you will want to go through the back of the mesh and then the back of the head. After you go through the back of the head, go to the string which is shown in the right photo.
-
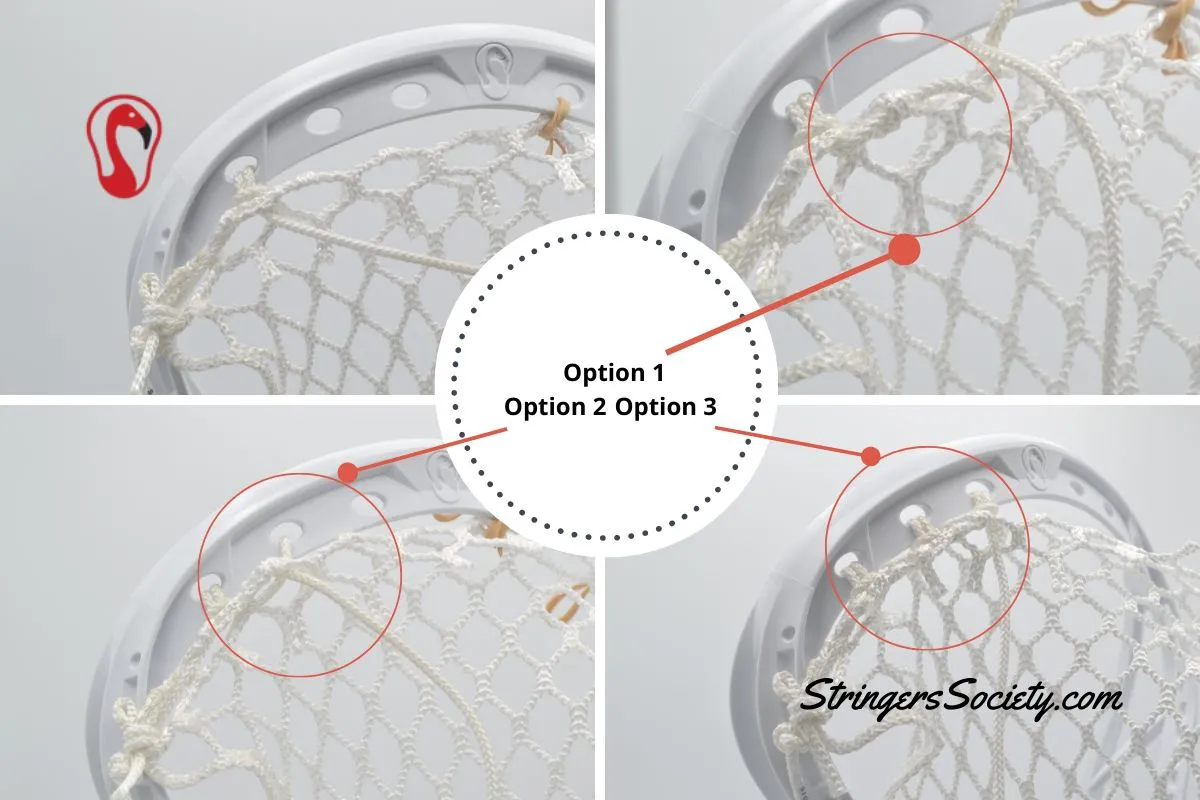
Skip, Bridge, or Attach The Third Lacrosse Mesh Diamond

Option 1 – This Lacrosse Top String variant shows how you can “bridge” the 3rd diamond between the 1st and 3rd Top String Hole.
Option 2 – This Lacrosse Top String variant shows how to attach the 3rd lacrosse mesh diamond with the 9D Hidden Top Sting Knot.
Option 3- This Lacrosse Top String variant shows how to attach the 3rd lacrosse mesh diamond with a Single 9D Hidden Top Sting Knot.
-
Continue Across Your Lacrosse Head

Now it’s a pretty repetitive process for the rest of your lacrosse top string. As you work your way across your lacrosse head repeat the tactics you learned in steps one through four.
-
Finished Lacrosse Head Top String

the final view
Supply:
- Lacrosse Mesh
- Lacrosse String
Tools:
- Time
Materials: Lacrosse Head
Broken in 9 Diamond Top String
As the 9 Diamond Hidden Top String matures and undergoes the natural wear and tear of gameplay, an intriguing transformation takes place. Over time, the strings subtly stretch, creating a broken-in version that introduces a delicate float between the mesh and the scoop.
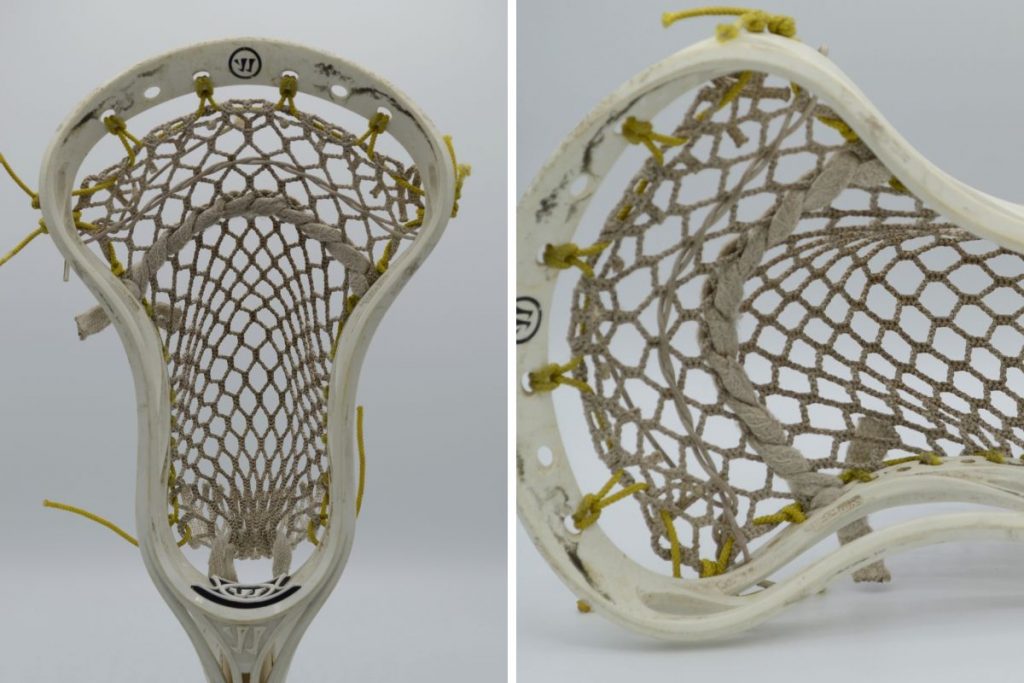
This evolution adds a layer of character to the lacrosse stick, reflecting the countless plays and maneuvers it has endured on the field. The result is a seasoned and personalized connection between the player and their trusted equipment, a testament to the unique journey of each game.
Ready to upgrade your stick?
Learn expert top stringing methods with our tutorials, then shop the best selection at Stringers Lacrosse Shop.


