In Part 1 of this series, we attached the leathers to the scoop of a STX Women’s Lacrosse Head. Now, it’s time to move on to the next phase: attaching the leathers, lacrosse sidewall, and installing the Trad-i-Tree lacrosse stringing tool. This step is crucial for securing the pocket and ensuring optimal ball control.
Materials and Tools:
- One 5-inch piece of lacrosse sidewall
- Trad-i-Tree Break-In Lacrosse Stringing Tool
- Two Lacrosse Sidewall Strings (28 Inches)
Step 1: Attach the Outside Leathers to the Throat of the Lacrosse Head
Start with the outside leathers and thread them through the inside of the lacrosse head’s throat. Use the bottom outside holes for this, then loop the leathers back around and thread them through the next set of holes to secure them in place.
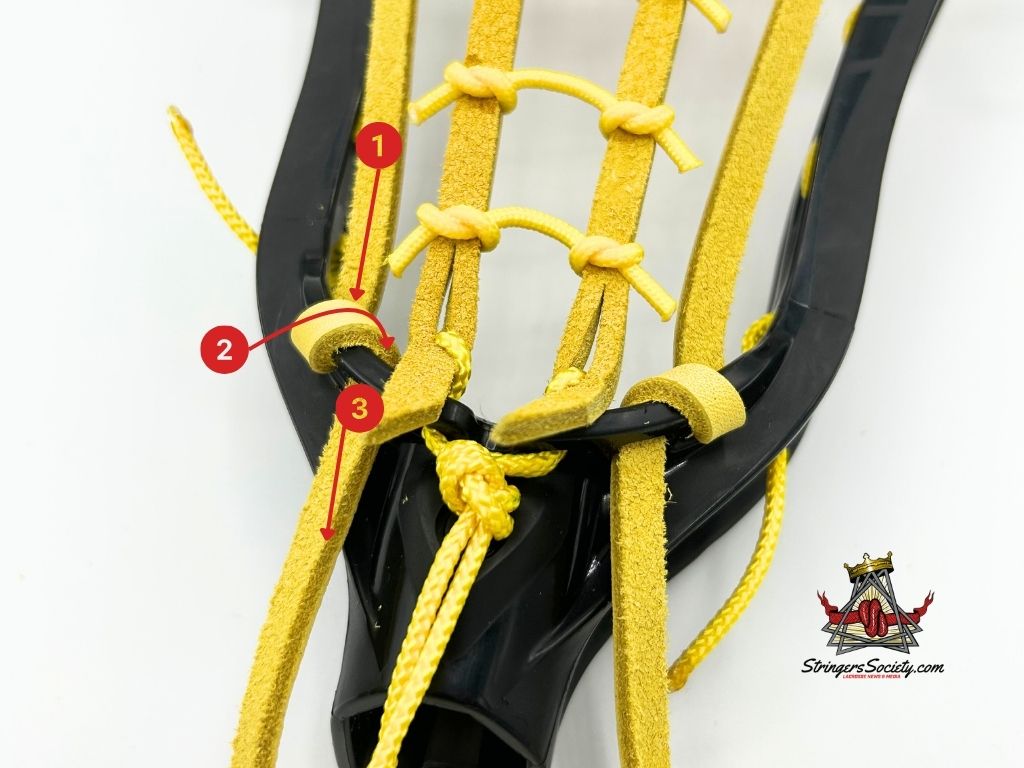
Follow the same steps to secure the other outside leather.
Step 2: Attach the Stx ProForm Pocket to the Throat of the Head
Begin by feeding your 5-inch piece of sidewall through one of the bottom string holes, then up through the leather and back down through the same hole.
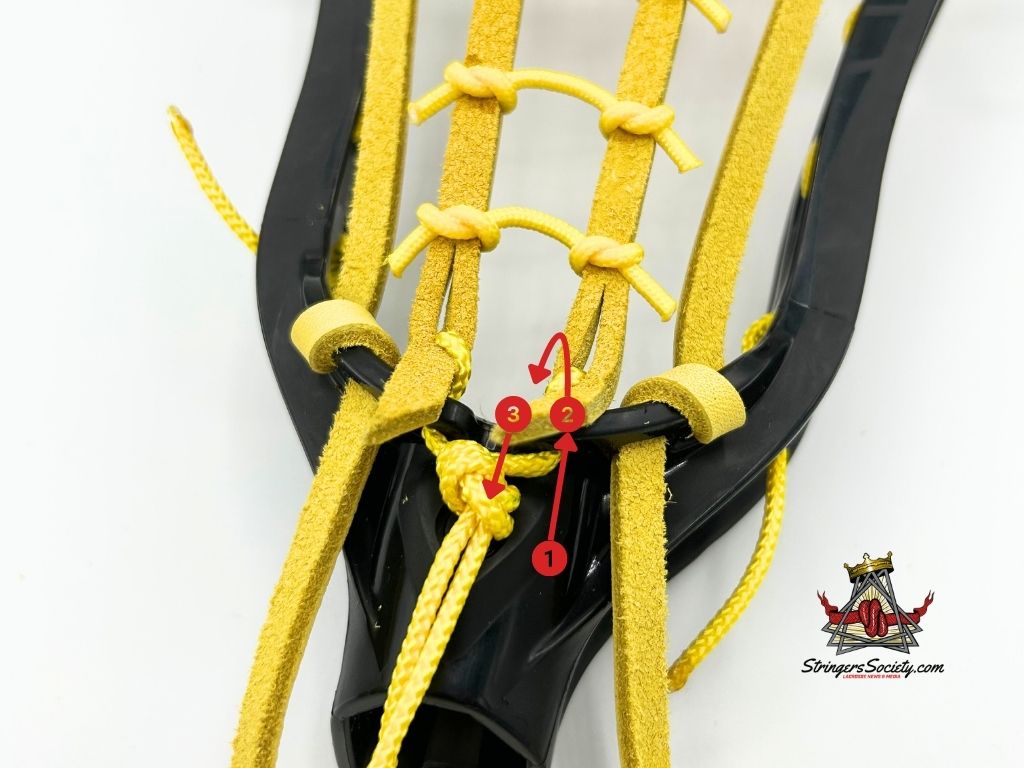
Next, attach the STX ProForm Ladder Pocket to the throat of the lacrosse head. Feed the same sidewall string through the other bottom string hole and attach the last leather.
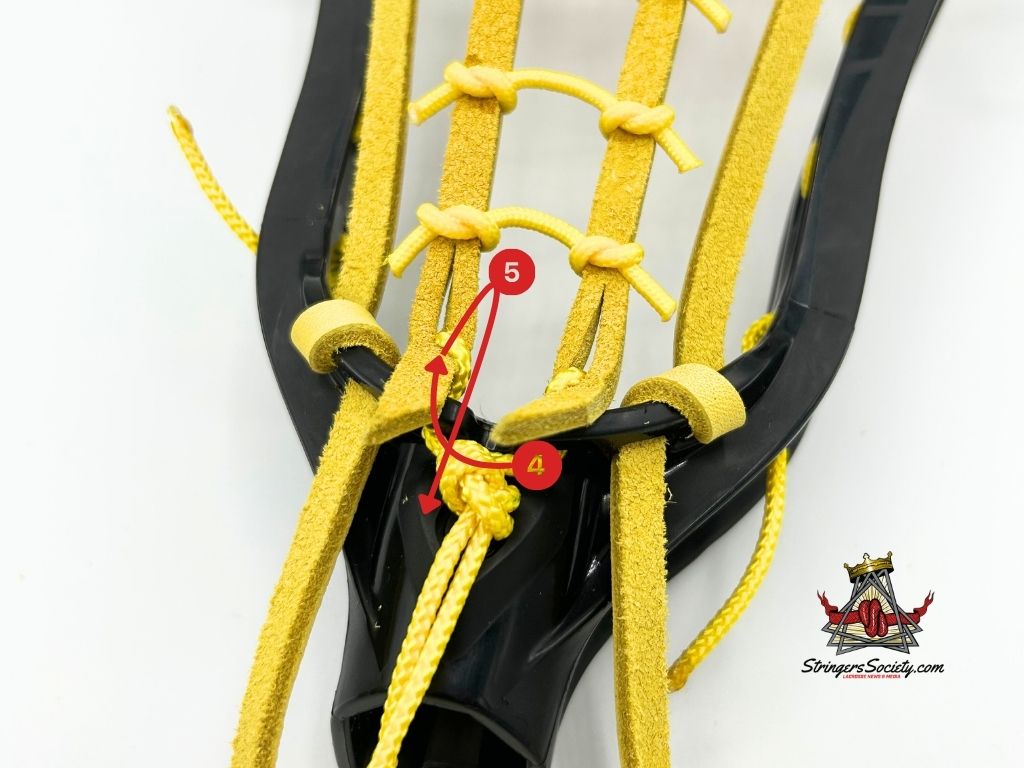
Now, pull the leathers tight and tie the two strings together, forming a knot that secures them to the throat.
Step 3: Use the Trad-i-Tree to Tighten and Secure the Leathers
Attaching the Trad-i-Tree break-in is easy. Gently slide it between the two sidewall rails and position it underneath the leathers.
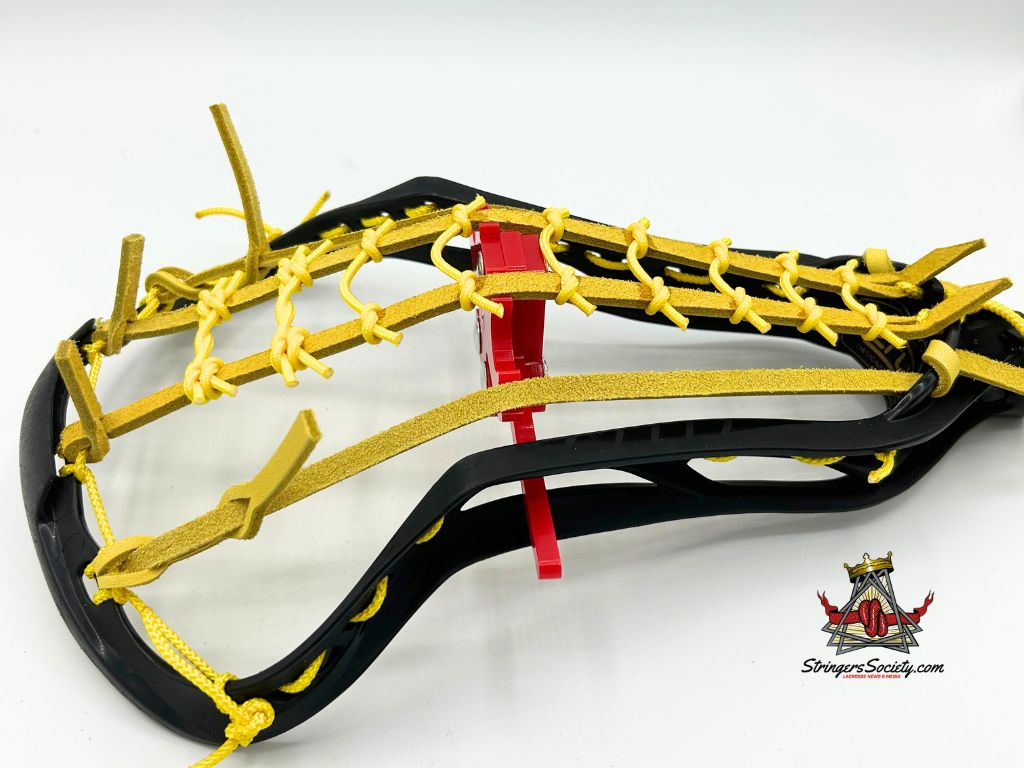
If the leathers are too tight, don’t force the tool into place. Instead, loosen the leathers slightly, position the Trad-i-Tree, and then re-tighten the leathers to secure it.
Step 4: Attaching the Sidewall
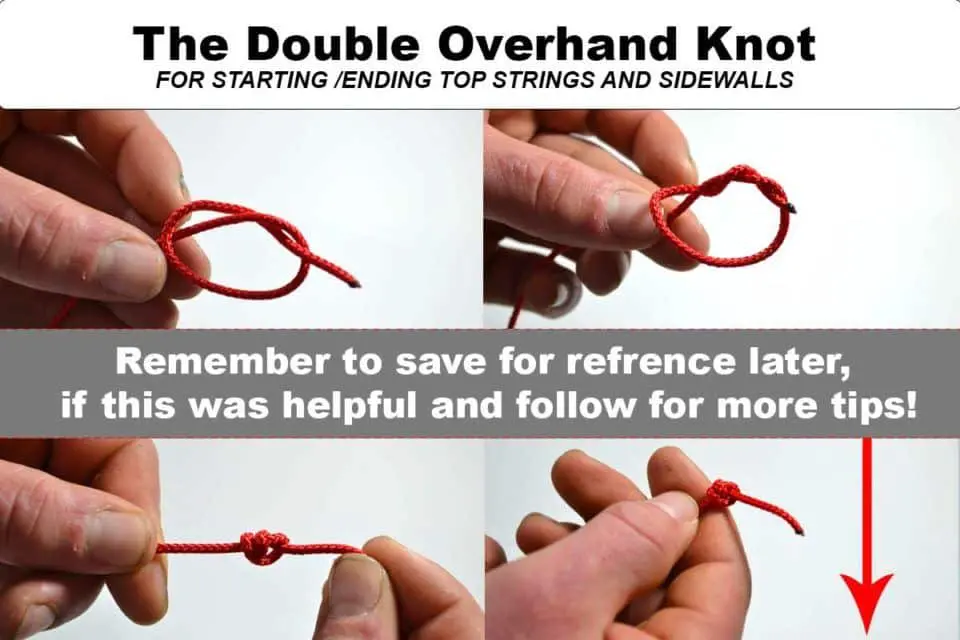
Lastly, we need to add sidewall prior to securing the crosslace in the next part of this series. Prior to attaching the sidewall to the head, we need to prepare the sidewall to be attached with a double overhand knot (pictured below).
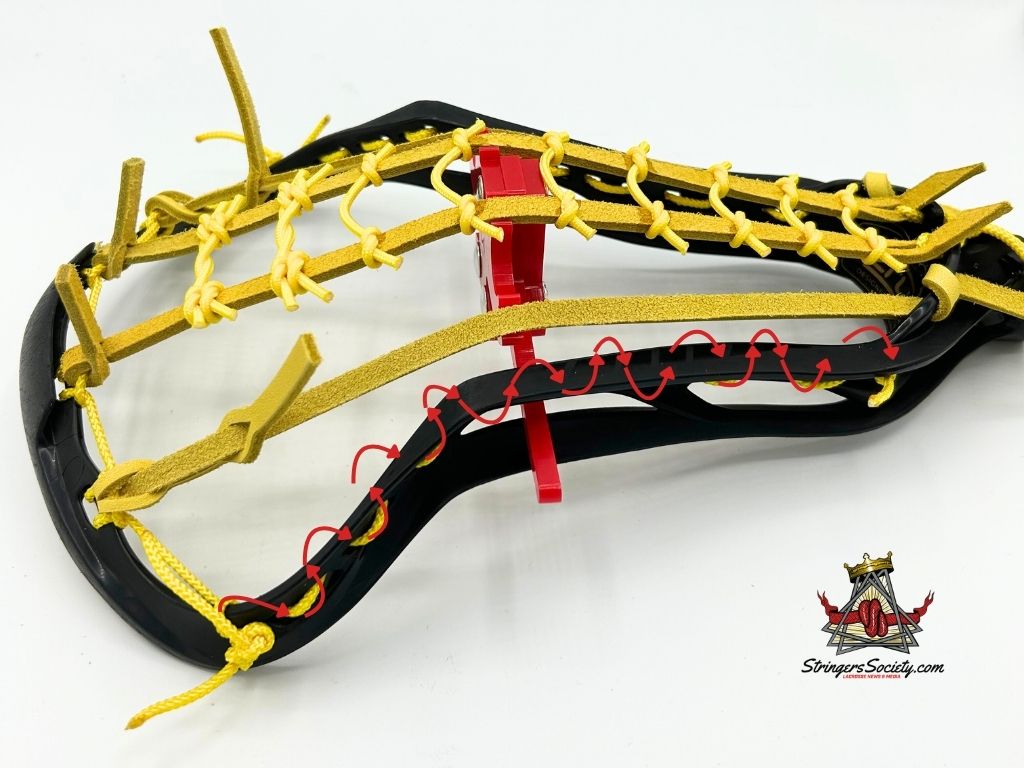
After preparing the sidewall, begin on one side of the head. Feed your sidewall string through the outside hole of the head. While there are different sidewall stringing methods, this tutorial replicates the STX ProForm pocket, which uses a downward weaving pattern (pictured below).
Now that you’ve mastered attaching the leathers and sidewalls, get ready to take your pocket to the next level! Stay tuned for Part 3 of the series where we’ll dive into attaching the crosslace and shooters. This final step will shape your pocket and complete the STX ProForm Ladder Pocket.

