Lacrosse enthusiasts, have you heard about the latest stringing rule updates for US Field Lacrosse? Effective this 2022 season, the use of certain stringing techniques, such as the Chenango Top String, is now banned. Although it may no longer be a legal option, there’s still value in learning and understanding the intricacies of lacrosse stringing. That’s why we’ve put together this comprehensive tutorial on the Chenango Top String – for educational purposes and for the love of the game. Join us as we take a closer look at this popular stringing pattern and how it was executed.
Chenango Top String Tutorial
The Chenango Top String is an eye-catching addition to your stick that brings a very tight pocket and channel into your stringing. A channel is a lane or rut created in the mesh meant to tug on the ball and slow down its release as you throw/shoot. By slowing the release you can make a very precise stick for direct passing and shooting
So, why pull down the mesh?
By anchoring the mesh against lower holes on the side of the lacrosse stick very tightly, this top string pulls the mesh in a way that creates a “fold” in the middle of the mesh. This allows more mesh to touch the ball at one time. When the ball is resting in this “fold”, or channel, it not only is directed out of the head in a straighter path because of the Chenango Top String; but, it also creates friction as the ball releases and delays the release. This delayed release can make an incredibly smooth and accurate shooting/throwing motion that is a “point to shoot” style of throwing if done correctly.
Advantages of the Chenango Top String
- The release from a Chenango Top String is not the only advantage since this channel can also improve ball security and increase hold. By having a tight channel that delays the release drastically you can pair that with a rigid “lip” inside your pocket created by the middle of the Chenango Top String that can allow you to throw fakes with the ball. The tightness of this channel can also improve the hold you will have with ball security when not in a throwing motion.
Disadvantages of the Chenango Top String
- Besides being difficult to string evenly, properly, and tight enough by many inexperienced stringers; the Chenango Top String can make catching more difficult for some players.
- Since the Chenango Top String creates open spaces at the top of the stick on the sides of the channel it reduces the area of your stick that is better for catching. While you can handle a ball that hits that high on your stick from a pass, it is much more difficult to do so than with a stick that does not have these spaces.
- Another downside some see with the Chenango Top String is that they don’t get consistent throws and shots due to the channel shifting. This can come from an uneven tension in the Top String that will make the channel move as you throw. This is avoidable if you string a tight and even top string.
Who is the Chenango Top String for?
Experienced stringers should try their hand at a Chenango, and even they will have a learning curve to go with this style. While there is a function to this Top String, the main purpose of it for many players is flair. The lacrosse top string really stands out and makes a player get more attention. This can be a blessing and a curse in many ways. Having a Chenango comes with a certain expectation and if you use one in a game and are unsuccessful, someone might let you know about it. So if you want to use a top string you should be sure to practice with it a lot so that you don’t draw the wrong kind of attention.
Stringing the Chenango Top String
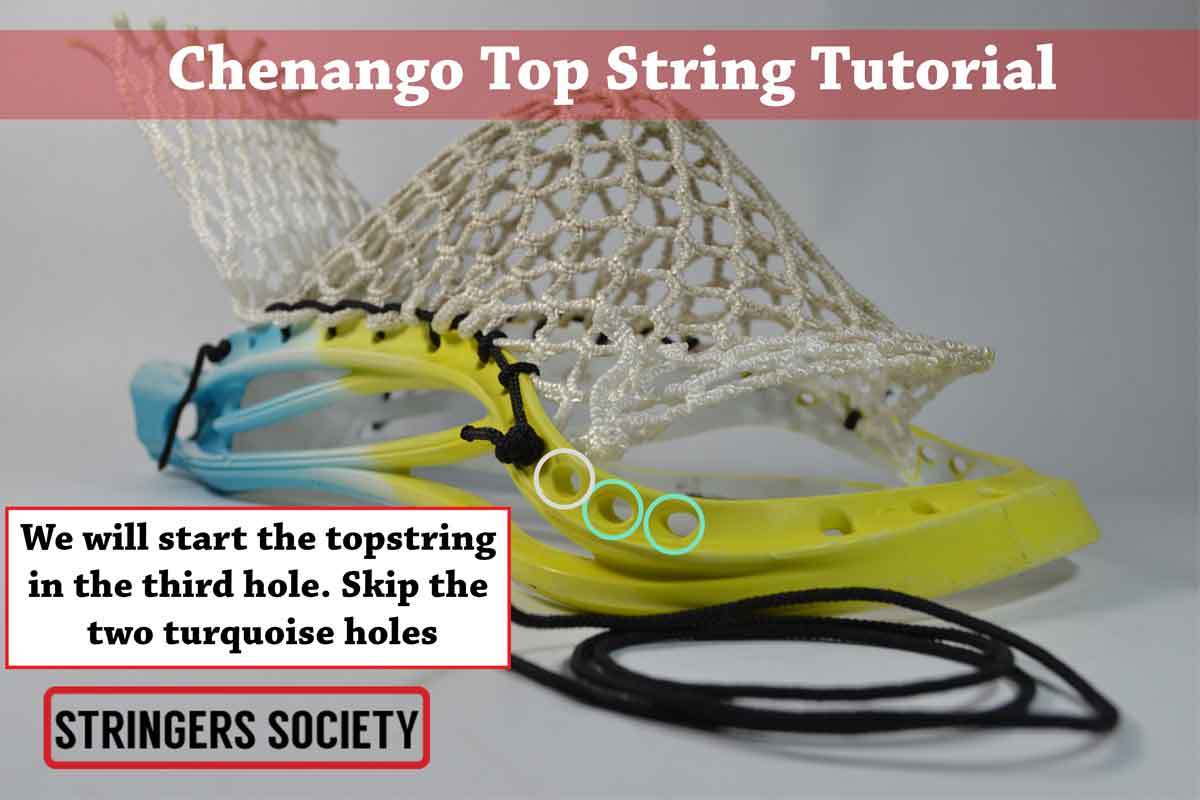
Step 1: Secure the sidewalls to the lacrosse head
Use any type of lacrosse knot that will lock the 3rd, 4th, and 5th sidewall diamonds down. You can even use zip ties to secure these diamonds. I wouldn’t string the rest of the sidewall, as it will make it more difficult to string. The point of locking down those three diamonds is to ensure an easy process while stringing the head. It’s pretty difficult to get a very even and correctly tensioned top without it. I’m not saying that it’s impossible rather than just more difficult.
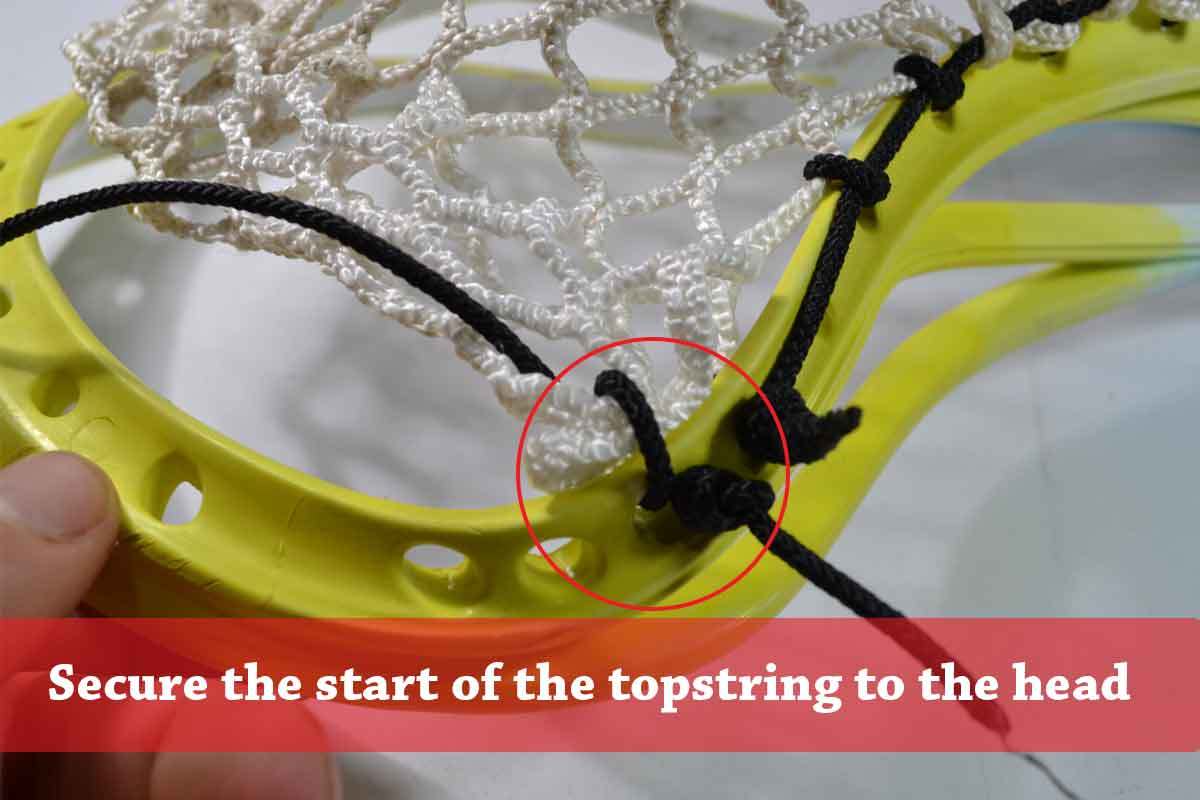
Step 2: Start the Chenango Top like any other top string
- Create a typical double overhand knot
- Feed the tip of your sidewall string through the hole & then the front of the mesh
- Loop the string over the sidewall and back through the hole
Step 3: To bridge or not to bridge the top string
Bridging the second and third diamond holes in your Chenango Top String makes a big difference in your channel. The Chenango Top String already has a very tight channel due to mesh being pulled down. Depending on your head/playing style, you might not want an extra tight channel and should skip bridging these holes. You may need to experiment to find out what you prefer. Once you know, let us know in the comments section below!
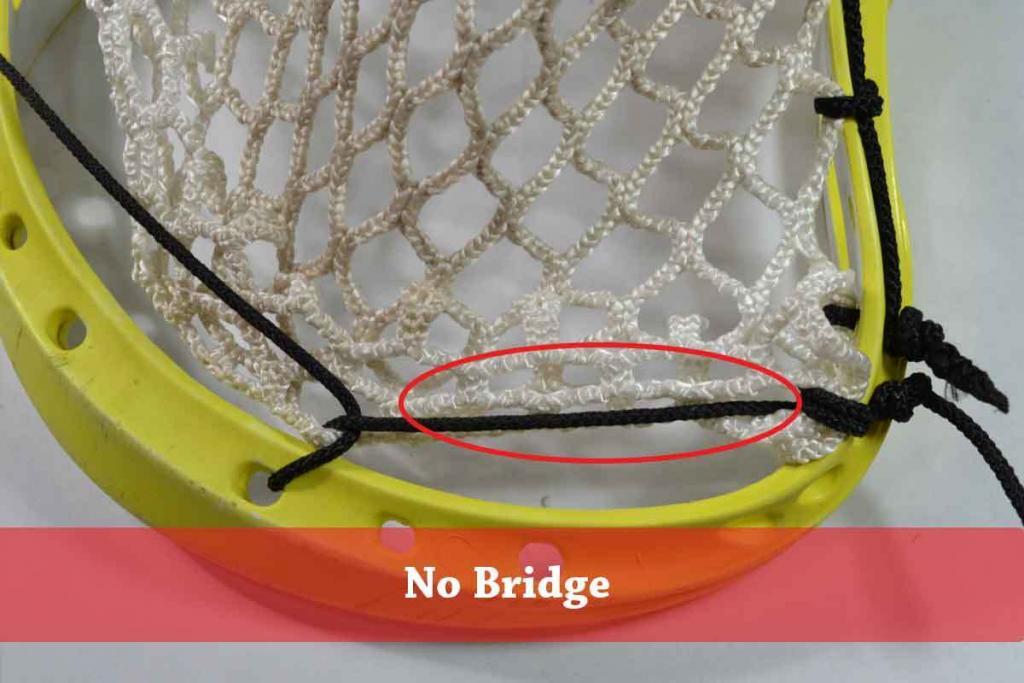
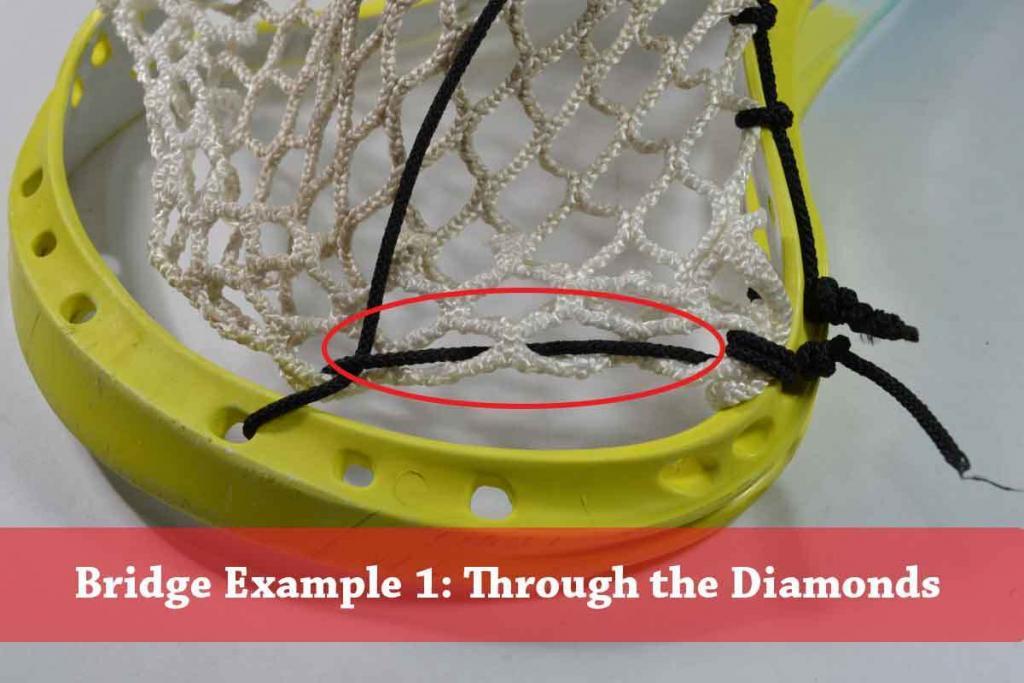
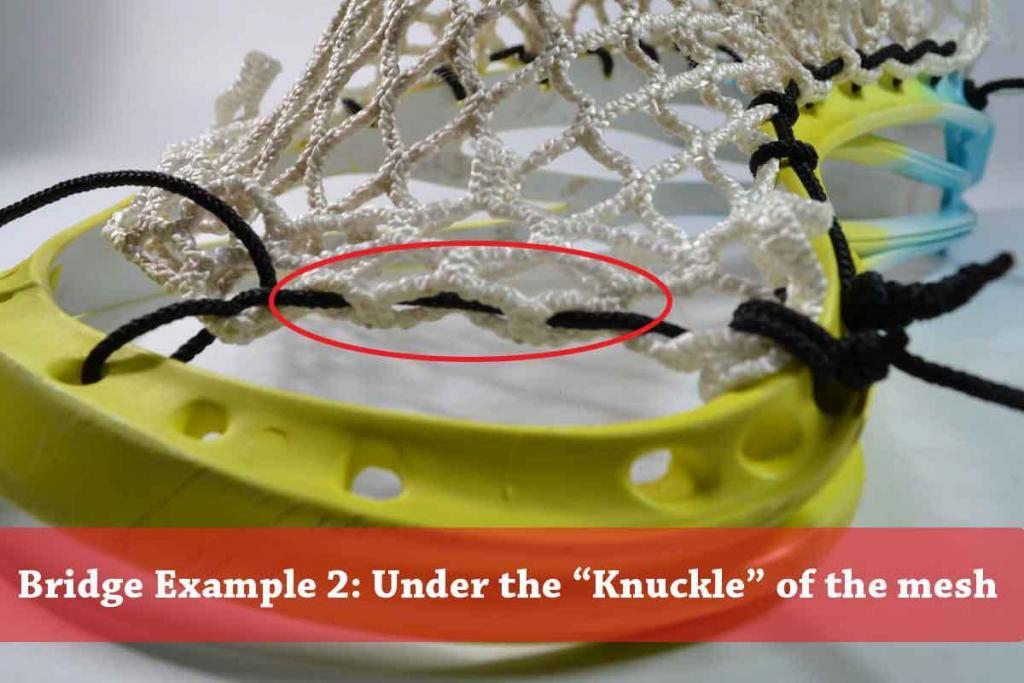
In Figure 3.1, we did not bridge the top string which means that the top string will only make contact with 4 diamond holes.
In Figure 3.2, we illustrate the first example of bridging the top string. Instead of only having 4 contact points, we have just secured 4 more diamonds to the top string. Since the fourth diamond in the lacrosse mesh is secured to the head as well as the first diamond, the two bridged diamonds will evenly distribute between the two holes
In Figure 3.3, we illustrate one last way to bridge the 2nd & 3rd diamonds. Due to the mesh, not sitting as nice as the first bridge we illustrated we did not choose that one to use.
1st Anchor Point on Chenango Top String
The rest of the stringing is pretty simple if you already know how to string a top string. For those of you who don’t know how to tie a top string knot, I will still illustrate photos and include steps for your convenience below.
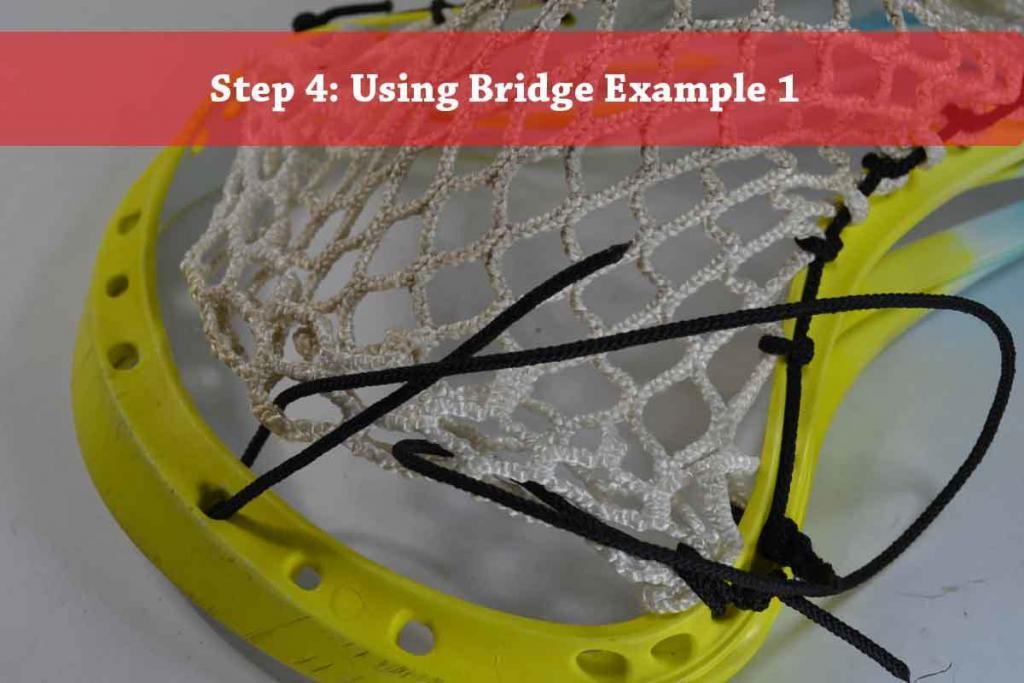
- The First Diamond Has Been Secured Already
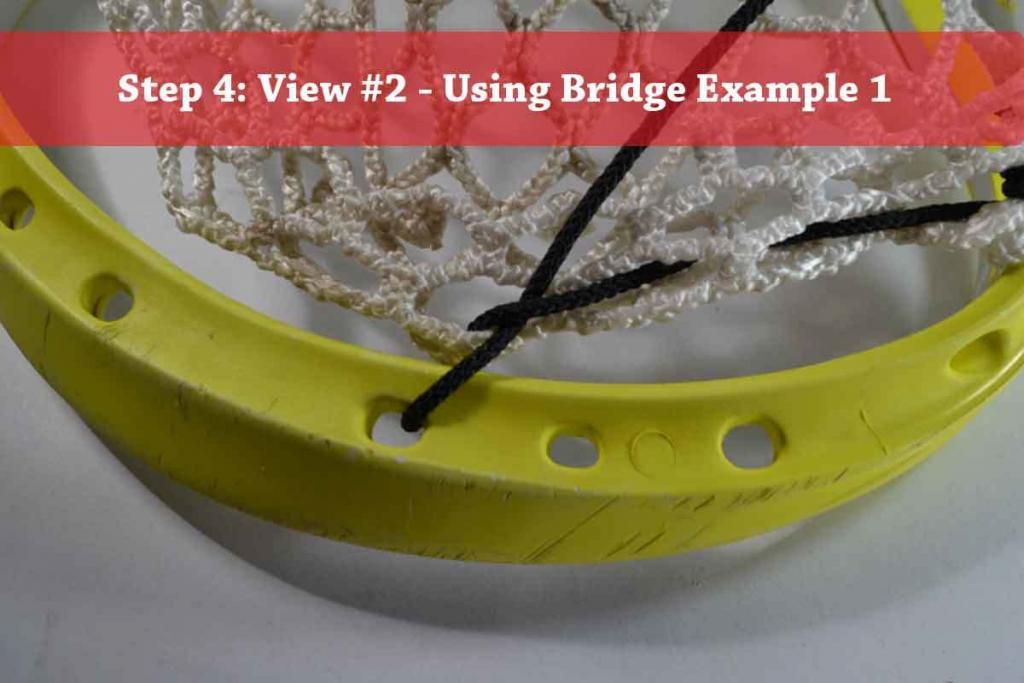
- The Second Diamond in the top string you will want to go down through it and back up the fourth diamond. Skip this step if you do not want to bridge your Chenango Top String.
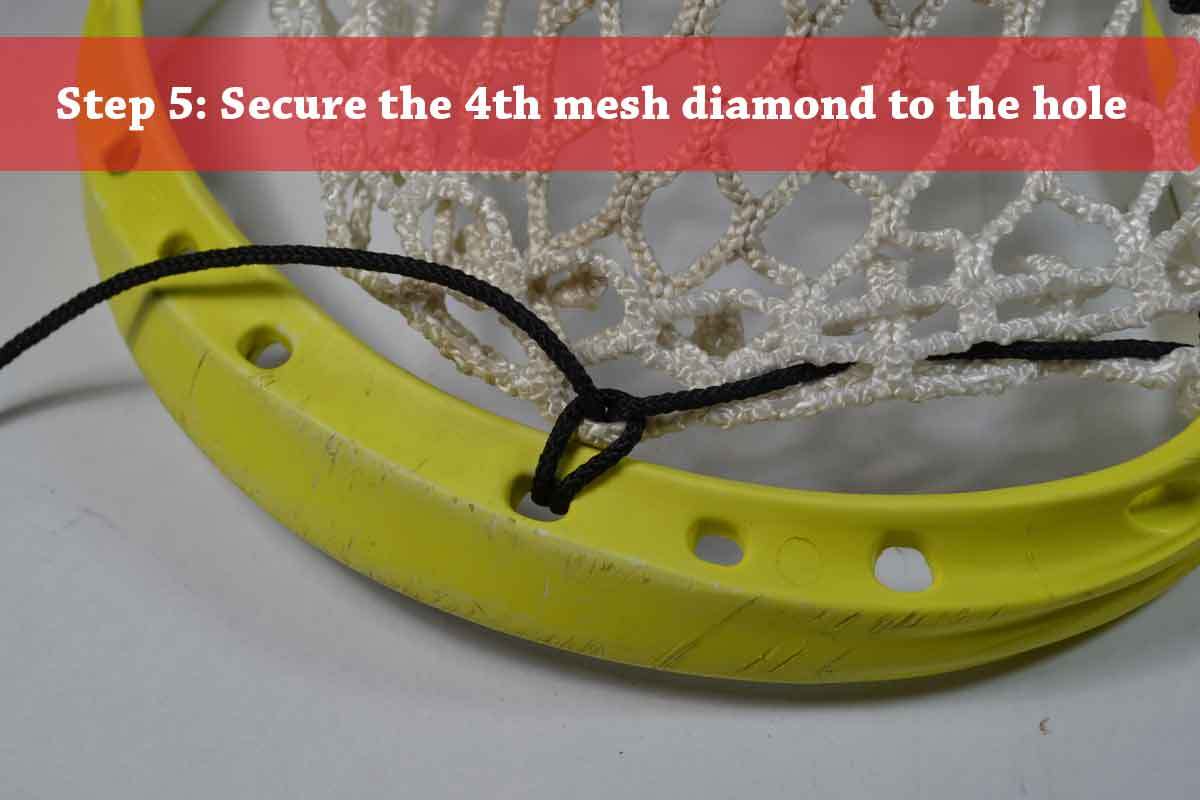
- The fourth diamond will be secured to the lacrosse head using a top string knot. To do this, go down through the mesh, up through the front of the scoop and through the loop you just created. If it’s loose you can tighten it by pulling back and forth on the string to tension it.
Step 5: Pull tight to secure the knot
This step is just focused on making sure that the fourth diamond is secured tightly and centered. If either your top string is too loose or uneven then your stick will become inconsistent. Make sure that the knuckle of the mesh aligns with the center of the hole.
2nd Anchor Point on Chenango Top String
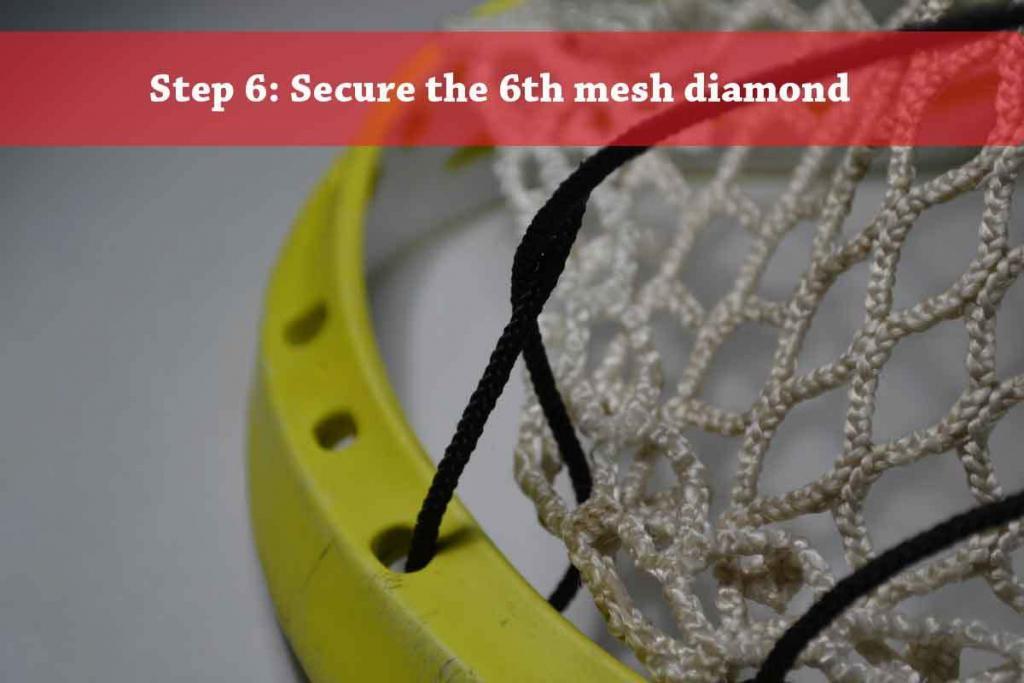
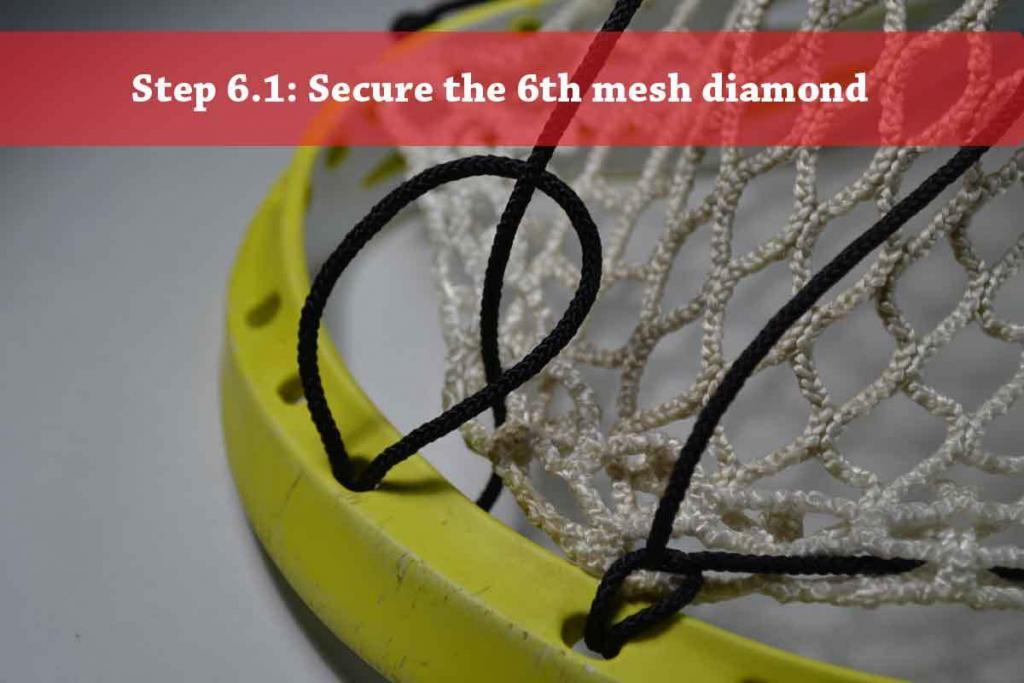
The sixth diamond is executed in the same way as the fourth diamond. To do this, go down through the mesh, up through the front of the scoop and through the loop you just created. If it’s loose you can tighten it by pulling back and forth on the string to tension it. Make sure that the fifth diamond is centered between the holes or your channel will be uneven.
Finishing The Stringing
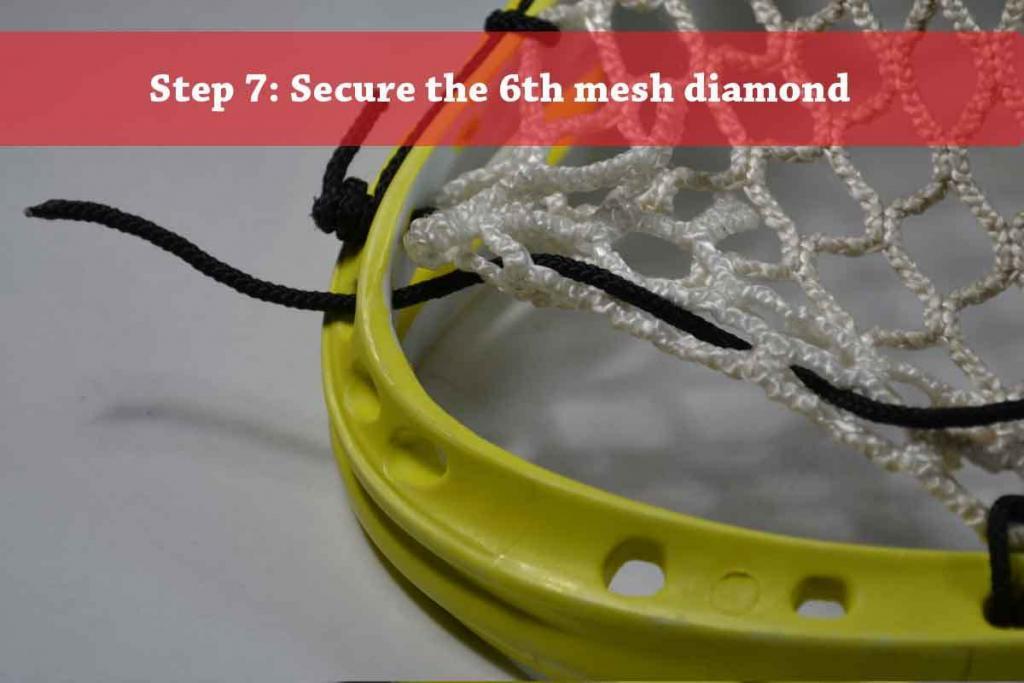
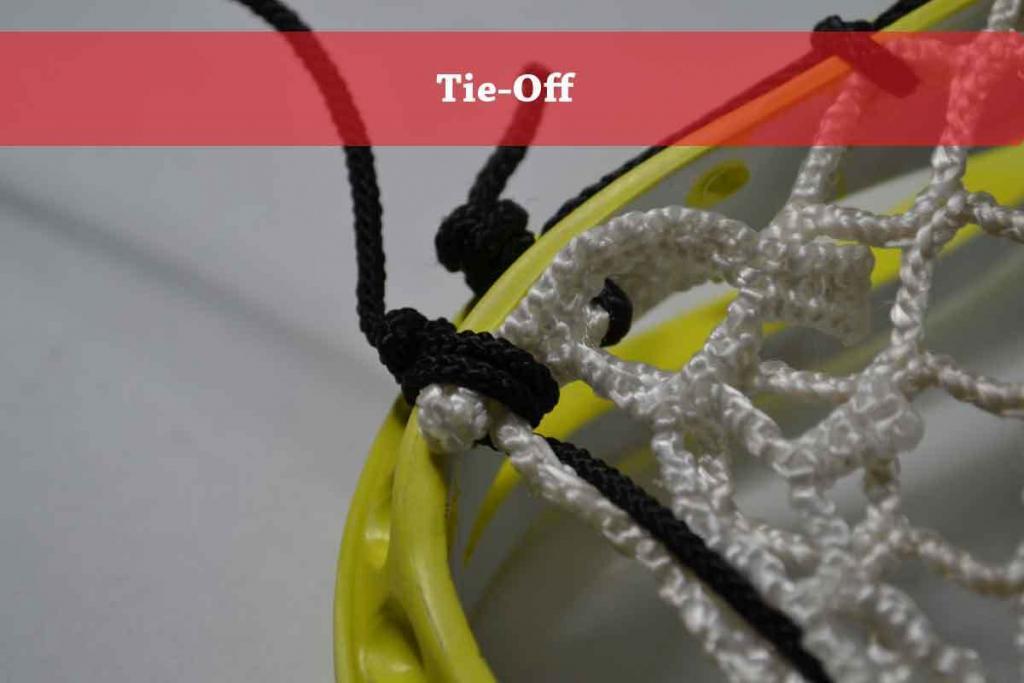
To finish this top string you will want to, go down through the 7th diamond hole and back up through the 8th diamond hole. Then go back down through the 9th diamond hole & through the sidewall. Now all you have to do is either loop it once or twice around the sidewall depending on how you started your top string and tie-off.
Final Results & Concluding Thoughts
I hope this stringing tutorial was beneficial for you and helped you understand the small tricks & tips while stringing the top string! If you have any questions, hit us on Instagram, as we will always get back to you as quickly as possible. If you enjoyed this tutorial, remember to share so we can keep delivering you the best work we can.
Ready to upgrade your stick?
Learn expert top stringing methods with our tutorials, then shop the best selection at Stringers Lacrosse Shop.


